I had a mysterious leak in heavy rain. Water would drip off the interior rear view mirror. I thought it was the weatherstrip and replaced that http://robhealey.com.au/Corvette/tech-tips/windscreenwindshield-weatherstrip-replacement/ Unfortunately the drip was still there.
Eventually I found the metal trim to the glass roof was slightly loose on the left hand side. Water was entering there and running along the trim to the front center and then into the car!
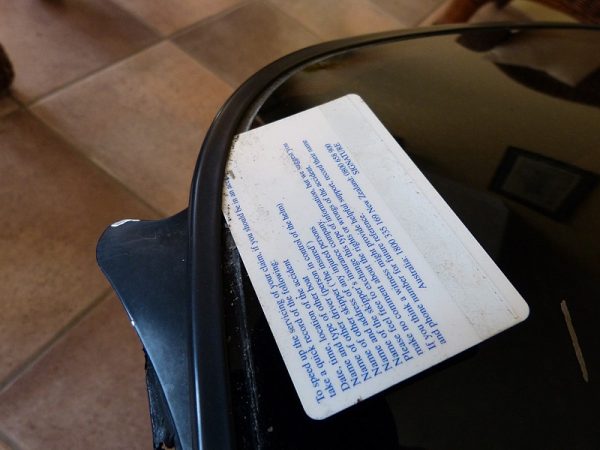
Removing the trim to do a proper repair was not easy. On the left side it had obviously come loose before, because there was clear silicone in the u channel of the trim. I wedged a credit card between trim and top of glass, lubricated liberally with prepsol and with much force worked it forwards up the left hand side. It came away reluctantly.
The trim had separated along the front to about the middle. After that it was really hard to remove the original factory adhesive.
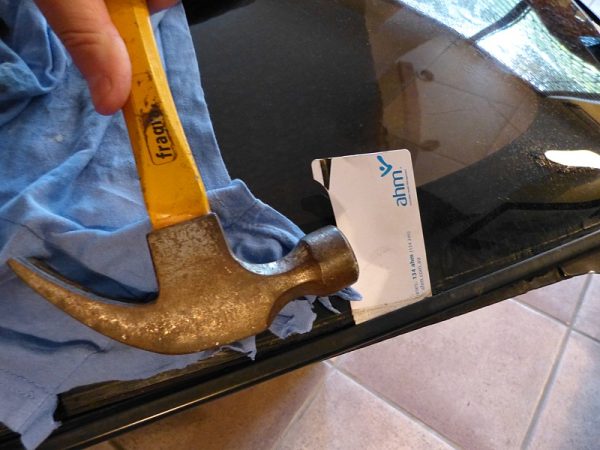
I began again at the rear on the right hand side. This side was extremely hard to unstick. I had to hit the credit card with a hammer to make it move, and it moved just 2 or 3 millimeters each hit!
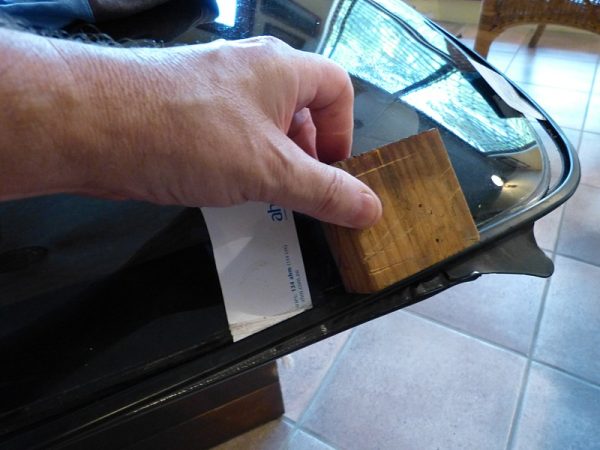
At about the point in the photo above, the card refused to move and I had to hit the metal trim with a wood block, just in front of the card, on the edge where my finger is. I hit it outwards, to drive the trim in the direction you would want to pull it
The pressure from the card and the wood block being just enough to release a little bit more trim from the glue. I had to hit the wood block hard. Kinda scary because a new glass top is very expensive.
On both sides when the trim was off to nearly the corner, I released the trim completely by hitting the rear end of the trim forwards, using a wood block of course.
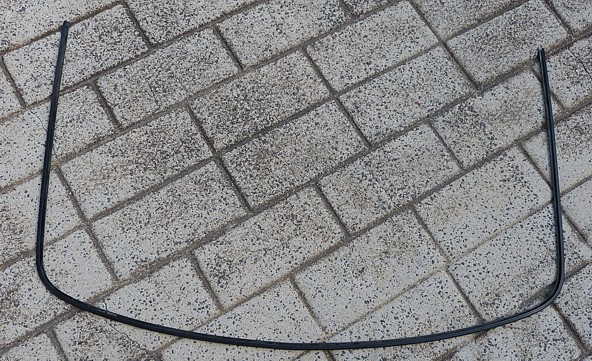
After a lot of struggle the trim was finally removed, without damage.
I cleaned up the trim first by scraping with a small screwdriver, then 80 grit sandpaper and then wire wool and kerosene. The original adhesive was hard to remove.
NOTE: The trim is very bendy and it is important to support it all while cleaning, to avoid having it kink, which would be very hard to fix.
I cleaned the glass top & bottom by scraping with the tip of a sharp knife, then with 160 grit sandpaper, being careful not to stray past the obvious edge of where the trim sits. I cleaned the edge using a Dremel fitted with sandpaper drum. I got the impression that this edge is the main area that holds the trim onto the ‘glass’.
Once everything was clean I wiped it all down with prepsol, twice. This removes any grease and makes sure the new adhesive will stick.
I used Sikaflex 221 as the new adhesive. At this stage it is very helpful if there are two people, both wearing disposal rubber gloves, with a few clean pairs handy. Also needed is some methylated spirits, I use it in a spray bottle, a roll of paper towel and a cardboard box to throw the paper in when it is covered with excess glue.
Sikaflex 221 has a cure time between 10 mins and an hour. I think the curing time is related to the humidity. I got about 15-20 minutes, which was barely enough, at 65% humidity.
First I laid a bead of Sikaflex in the U channel of the trim. Too much adhesive and the trim will refuse to be pushed on. (You can guess how I know that!)
Then I fitted the trim back on the glass, trying to fit it without sliding it backwards too much, which might create areas with little adhesive.
I cleaned up excess glue by spraying with metho and using paper towels. It is much easier to clean up wet Sikaflex than after it has dried. It’s important not to saturate the glue areas because the Meths can stop the Sika from drying properly, so use just enough.
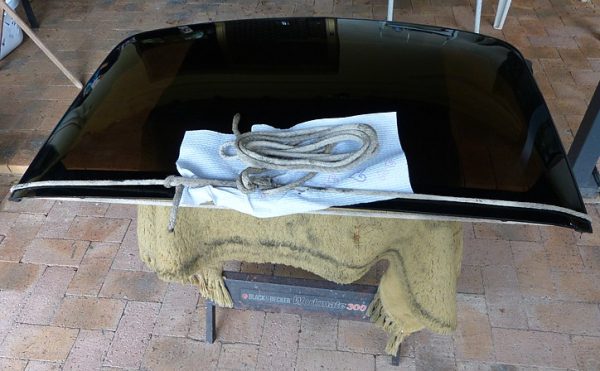
Before the Sika had set I tied a rope under pressure around the rear, holding the two ends of the trim against the glass.
I carefully cleaned up any remaining Sikaflex and left the roof for few days. It would probably be OK after 24 hrs but having put a lot of effort into the job, I preferred to leave it as long as possible.
Hope this helps a fellow Corvette owner some day.


December 1st, 2015 at 11:45 am
Put the seal on the glass first, but be sure you have it soft before you try to put it in. Once you have it ready have some one isidne of vehicle then take the glass and start it in one corner making sure that you have it started into the grove of the rubber sealand then work it around until you have it in. Becareful not to break the glass
January 23rd, 2017 at 9:41 am
I’m so glad i read your article, i took the glass panel roof off my 88 Corvette 35th tear anniversary Edition i purchased oct 2016. I noticed on about the middle of the glass it separated and pulled away from the glass. I want to repair this properly. After i clean up the glass and the trim, do i use any special glue that you would suggest or can i use clear silicone and let it dry really well? Also the 2 metal edges in front of the glass section, one on right and one on the left,do they have to be removed or the edge trim fits under that?Please reply, thank you and have a great evening.
January 23rd, 2017 at 10:32 am
Hi Ernest, I used Sikaflex 221 as the adhesive to hold the trim onto the glass. In fact it isn’t glass on mine but perspex.
I live in the tropics and unfortunately the sikaflex has stretched a little on one side because the trim wants to bend away from the glass.
There is a special glue that car body shops use when repairing plastic bumpers, it’s very expensive but the best stuff for the job.
I had one of my headlight covers detach and I got a local body shop to glue it back on with that glue – they always have a tube open and it only required a squirt.
I don’t know the name of it, but it’s a sandy coloured paste.
I wouldn’t trust ordinary silicone, it’s not adhesive enough for this job.
If you mean the two little edges at the front corners, I think they are rain guards. I didn’t remove them.
January 30th, 2017 at 10:40 pm
This project worked out great,all done and my top is back on. Now i noticed when i go for a ride i’ve been having a rattle, i always had this since i purchased this Vette in september of 2016.Yesterday i located the rattle. It is the top itself, now i need to look on your site if there is adjustments on the targa top brackets. I do see that the brackets move around a little i would guess that would make it easier to line up the tie down bolts.Any suggestions? Thank you in advance and have a great day.
February 1st, 2017 at 10:02 am
If the top is rattling then I’d guess one or more of the 4 fixing bolts is either loose or the rubber weatherstrip is compressed or perished. If the rubber doesn’t push back as you tighten the bolts, then there’s nothing to prevent the roof moving a little.
I don’t know of any adjustments, but that may be possible. My bet is the rubber weatherseal.
As you may know, the C4 was originally designed with a fixed roof so it was part of the structure, making the car stiff. At the last minute GM decided to make the roof removable, but they didn’t strengthen the chassis design to compensate, so with the roof off the car does twist a bit – you can sometimes hear the rear hatch squeak as you drive diagonally over a speed bump and the rear view mirror shudders on bumpy roads. So the roof is under some stress when it’s on.
February 2nd, 2017 at 10:29 pm
Very helpful info. i did had to line up the brackets on the rooftop. tightened all 2 brackets, and no more rattles. Thank you for your tips.