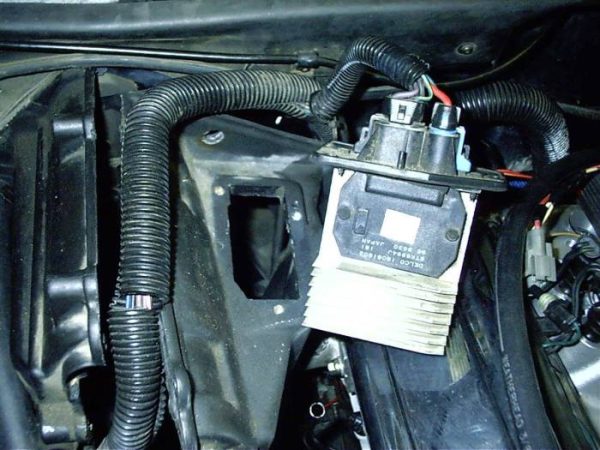
C4 Corvette Courtesy Lights Dimmer Module
Here’s a picture of the circuit board, heatsink removed –
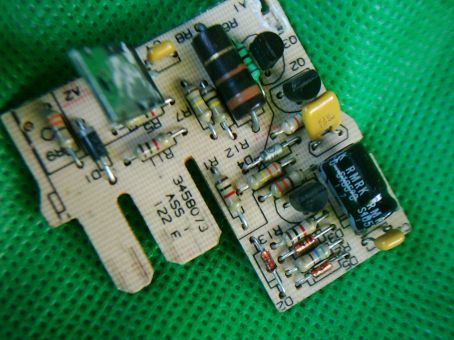
If your courtsey lights don’t go on when either door is opened, the dimmer module may have failed.
Signs that the module has failed are –
The hatch door switches don’t work, but the console hatch switch does.
The interior lights come on by turning the light switch but not when you open the door, or they may stay on all the time.
Test by grounding the thick white wire at the module – door hatch switches should work.
Check the black wire is connected to ground. If so, then dimmer module is not connecting these two wires together and making a circuit when the doors open.
Check that the dimmer is receiving a ground at the yellow wire when either door is open. (This yellow wire may be thin white for some years.)
The dimmer module is no longer available as a replacement part. Also one of the main electronic components is no longer available.
My module was fixed by an electronics expert who examined the circuit and found a suitable replacement part.
Here is all the info I have – I’ve listed most of the parts, in case it can help anyone else.
Location:
The dimmer module is in a small 2"x2"x.5" black plastic box, taped to the wiring loom behind the centre dash. (In my converted to Right Hand Drive vette, the module was midway behind the passenger crash pad.)
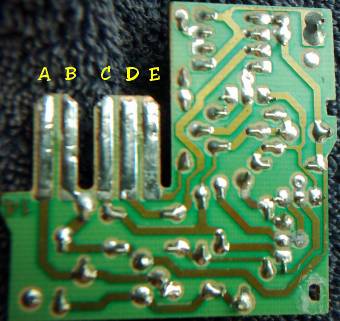
The module is wired –
"A" White wire goes to all of the lamps and supplies negative
"B" Black is Ground. Shorting White to Black will turn the lights on.
"C" Pink/White is 12 volts from the Ctsy/Clk fuse which is hot all of the time.
"D" 2 Yellow wires – (these may be white for some years) come from the Door switches. The switches close when the door is open and provides a ground on the Yellow (or white) wire/wires depending on what door is open.
"E" is the Reset signal used by the Delay Module to turn the Module off when you turn the ignition key to on. So the lights go off.
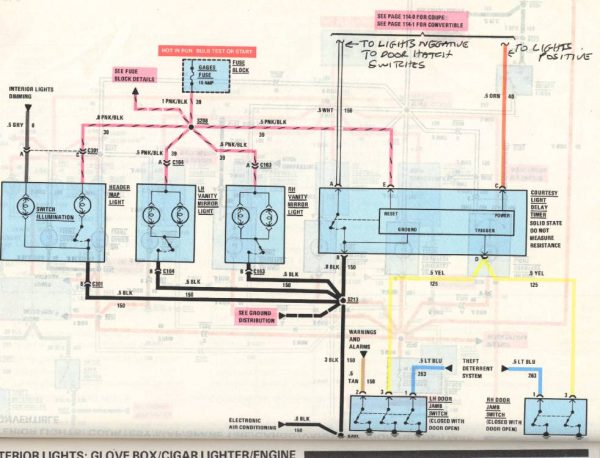
Here’s the circuit diagram in the GM Manual for my 88 Corvette.
The dimmer module is thin and the circuit is not very complicated –


The metal piece is a heatsink on a large transistor.
The Transistor is in a TO 220 case, and in mine tested faulty.
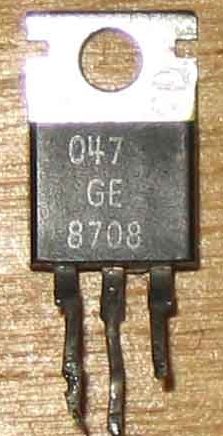
It’s no longer available.
Mine was replaced with an MJE 3055 and it worked again!!!!
I suspect that it fails because it takes the most heat/power. The heatsink begins to get warm to the touch within a few seconds.
A test of the amp draw showed my courtesy lights draw 2.8 amps and pressing the rear hatch release increased the draw momentarily to somewhere between 3 and 4 amps.
All parts in the module from my 1988 Coupe look brand new.
Here’s a parts list – only one signal diode was unreadable.
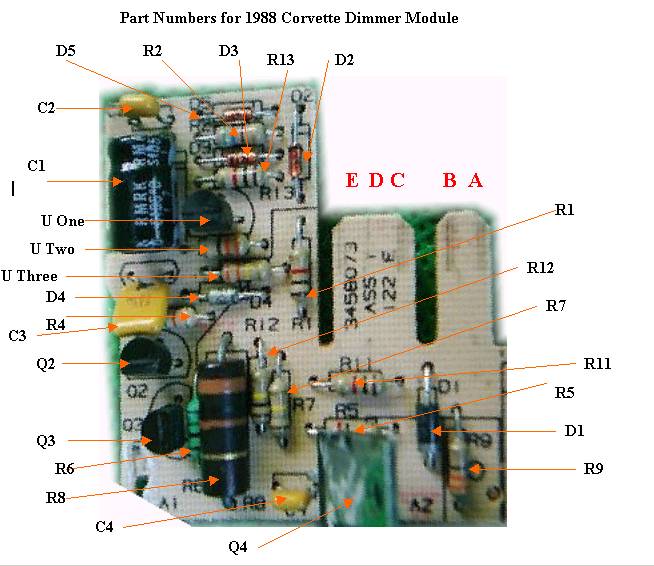
3 parts were not given a number so I’ve called them U (Unknown) One, Two, Three

Here is a diagram drawn up to work out how the circuit works –

A – to Lamps
B – To Battery negative
C – To Battery positive
D – To door switches ( a negative volts signal here will turn lights on, including a 15 seconds delay after low is removed)
E – to positive of dash lights ( a positive voltage signal here will turn lights off)
I hope the information here will help someone else repair their module – mine has been working since August 2005.


