Stereo –
500 Watts should do it…………
One of the options available for the 1988 Corvette was a special Bose stereo system.
The unit was designed by Bose especially for the Corvette’s acoustics and is very different from a standard car audio system because there is an individual amplifier mounted beside each speaker.
The speakers are surprisingly small and Bose designed special enclosures to enhance them and make them sound like larger ones. The speakers are also 1ohm which is unusual compared to the normal 4 ohm car speakers.
The technology is impressive and the Bose sounds good, but it’s not really loud enough and is only a radio and cassette deck.
I enjoy loud, distortion free music. A 200-watt CD Player performed well in my last car but I decided to try and improve on it. My ambition was to have a good clear sound system that fitted into the existing speaker areas because I didn’t want to lose any space in the car. I received a lot of helpful advice from the Corvette forum, from audiophiles who had ‘been there and done that’.
I decided to remove the bose system entirely and fit 6×9 speakers in the rear and 6" round ones in the doors, powered by a 500-watt amplifier – that should do it !
The finished system –
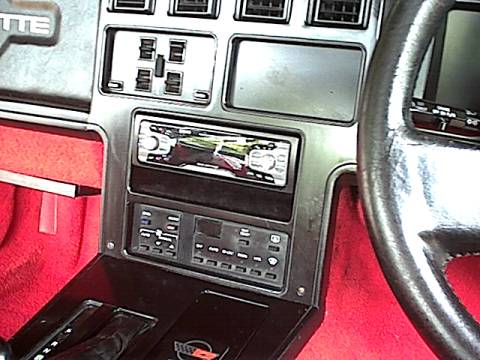
The Bose head unit is unusual because it is one and a half times the standard height, which makes fitting a standard 1 din unit more difficult.
The installation was complicated by having to remove the door amps and speakers, which are glued in and larger than the space available to remove them.
The biggest problem was finding somewhere for the 500-watt amp. The available space in a Corvette is limited, there’s no boot or glove box in the dash. After about 6 weeks of deep thought the solution was to mount it under the passenger side dash.
Because it’s fairly heavy I made up some brackets from mild steel that connect to the aluminium cross frame behind the dash. As the area is very cramped to work in, even with the seats removed, I tapped threads into the brackets, so those bolts could be tightened with just one hand.
Here’s one of the brackets held in front of the amp.
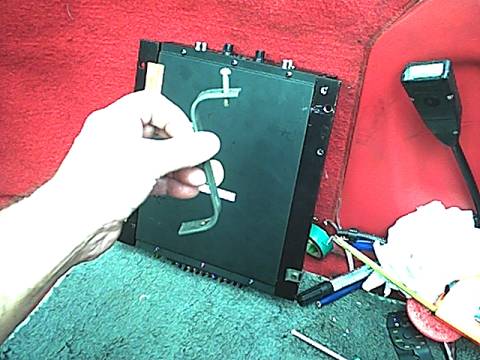
Installing the amp took many hours but I know that it’s firmly fitted. The wire terminals are on the outside end, with easy access and the gain controls are on the other end, reachable from the driver’s side for easy trimming.
You can just see the front edge of the amp under the passenger side dash.
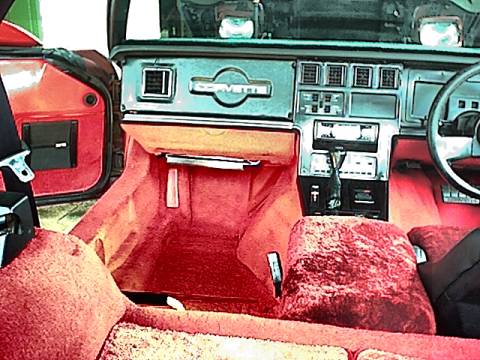
Fitting the CD unit was difficult because of the 1 & 1/2" din size hole. I mounted the CD unit at the top of the space and constructed a felt lined tray underneath to store CD’s etc.
I cut 4 pieces of aluminium angle to length and connected one piece to each side of the CD player. I planned to connect the other two pieces to the sides of the hole so that the CD would sit on them and be held firmly with self-tapping screws.
Once the CD unit was in place it was impossible to reach in and insert or tighten screws. Eventually I solved the problem by gluing the aluminium to the plastic sides with Sikaflex, a very strong silicone glue. I wedged everything in making sure I had lined everything up exactly and let the glue dry overnight.
Here’s a picture of the CD unit sitting on the aluminium brackets.
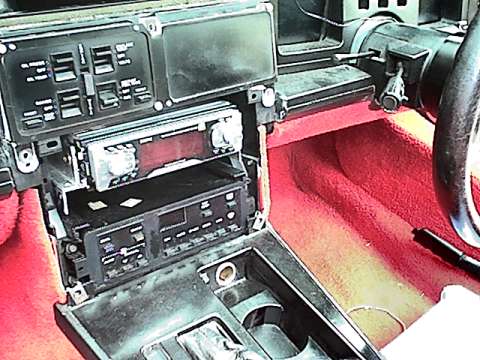
The Sikaflex held the aluminium angle in the correct position but it was not possible to fit a drill into the space to make locating holes, so I heated up a nail with a butane soldering iron and used that to make holes in the plastic for self tapping screws.
I ran a heavy gauge power cable directly from the battery to the amp and used the existing Bose connections to power up the head unit, which has remote switching for the amp and power aerial. The line out RCA sockets on the head unit connect to the amp with gold plated RCA plugs
Making up a black felt lined tray to fit in the space underneath was easy. I re-fitted the front cover and stepped back to admire my work.
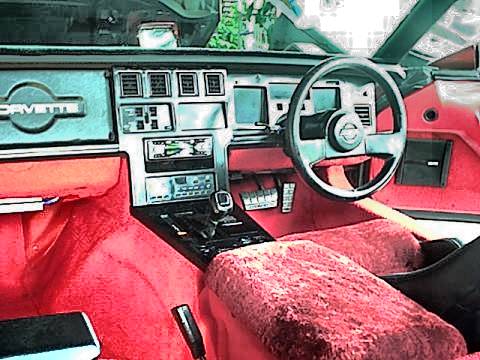
I Finally finished this project in February 2004 – I experimented with 6" round door speakers but found it hard to get a constant balance between front and rear speakers. It was hard to set the 7 band equaliser in the Sony CD player to suit both sets of speakers, basically the rears needed some highs and the front one’s some lows.
I was very happy with the rear speakers so eventually I cut out larger holes in the doors and fitted identical 6 x 9s into an aluminium plate that was bolted to the inner door frame. Now I have good balance between front and rear and can contour the sound to suit the acoustics of the Corvette and my ears.
The volume is impressive, you can feel the kick of the drums through the seat and doors. The gains on the amp are set to just under half. At ordinary levels the sound is very clear, a very satisfactory project.
Special thanks to the Audio section of Corvette Forum and in particular ‘Kale’, for so much information.

