Find Rob on Google+
Mon
10
Apr

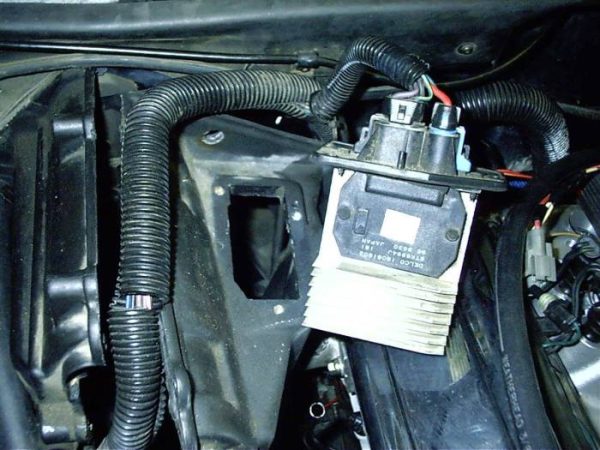
C4 Corvette Courtesy Lights Dimmer Module

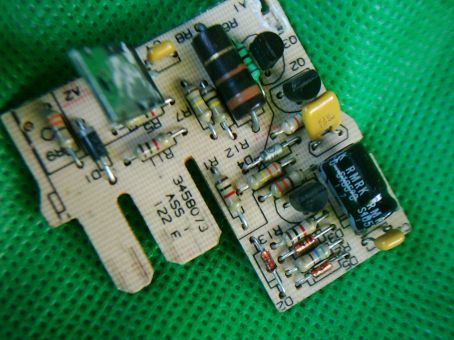
Here’s a picture of the circuit board, heatsink removed –
cuboard

If your courtsey lights don’t go on when either door is opened, the dimmer module may have failed.

Signs that the module has failed are –

The hatch door switches don’t work, but the console hatch switch does.

The interior lights come on by turning the light switch but not when you open the door, or they may stay on all the time.

Test by grounding the thick white wire at the module – door hatch switches should work.

Check the black wire is connected to ground. If so, then dimmer module is not connecting these two wires together and making a circuit when the doors open.

Check that the dimmer is receiving a ground at the yellow wire when either door is open. (This yellow wire may be thin white for some years.)

The dimmer module is no longer available as a replacement part. Also one of the main electronic components is no longer available.

My module was fixed by an electronics expert who examined the circuit and found a suitable replacement part.

Here is all the info I have – I’ve listed most of the parts, in case it can help anyone else.

Location:

The dimmer module is in a small 2"x2"x.5" black plastic box, taped to the wiring loom behind the centre dash. (In my converted to Right Hand Drive vette, the module was midway behind the passenger crash pad.)

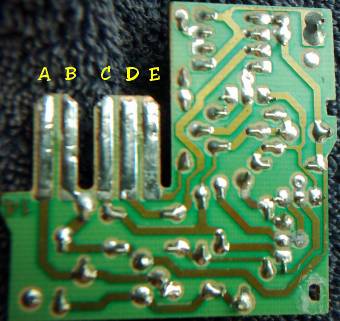
The module is wired –

"A" White wire goes to all of the lamps and supplies negative

"B" Black is Ground. Shorting White to Black will turn the lights on.

"C" Pink/White is 12 volts from the Ctsy/Clk fuse which is hot all of the time.

"D" 2 Yellow wires – (these may be white for some years) come from the Door switches. The switches close when the door is open and provides a ground on the Yellow (or white) wire/wires depending on what door is open.

"E" is the Reset signal used by the Delay Module to turn the Module off when you turn the ignition key to on. So the lights go off.
circuitback

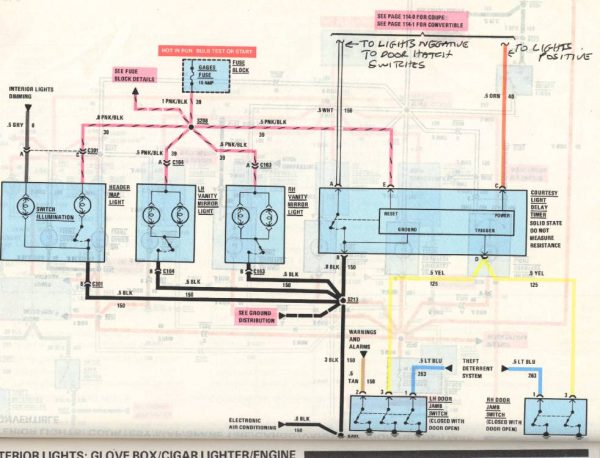
Here’s the circuit diagram in the GM Manual for my 88 Corvette.
timer-circuit-page1

The dimmer module is thin and the circuit is not very complicated –

sideview

topview

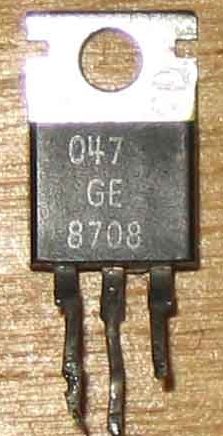
The metal piece is a heatsink on a large transistor.

The Transistor is in a TO 220 case, and in mine tested faulty.
to220

It’s no longer available.

Mine was replaced with an MJE 3055 and it worked again!!!!

I suspect that it fails because it takes the most heat/power. The heatsink begins to get warm to the touch within a few seconds.

A test of the amp draw showed my courtesy lights draw 2.8 amps and pressing the rear hatch release increased the draw momentarily to somewhere between 3 and 4 amps.

All parts in the module from my 1988 Coupe look brand new.

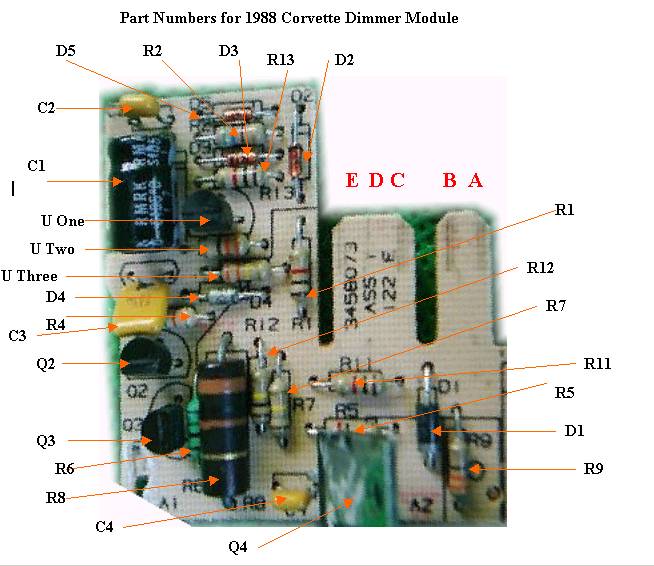
Here’s a parts list – only one signal diode was unreadable.
circuit-board-parts1

3 parts were not given a number so I’ve called them U (Unknown) One, Two, Three

table

Here is a diagram drawn up to work out how the circuit works –

garyscircuitmaster22

A – to Lamps

B – To Battery negative

C – To Battery positive

D – To door switches ( a negative volts signal here will turn lights on, including a 15 seconds delay after low is removed)

E – to positive of dash lights ( a positive voltage signal here will turn lights off)

I hope the information here will help someone else repair their module – mine has been working since August 2005.

back to top

Fri
2
Dec

2005

January – Cleaned greased and re-adjusted wipers.

April – fitted new memcal to ECM changing coolant fan on/off settings to On 96C Off 91C. Also changed parameters to suit upgraded heated O2 sensor. The new chip made the car run better, crisper. There were four different base settings for 88 depending on which state and emissions legislation the car was bound for. Turns out I got a better setting!

May – fitted re-engineered Throttle Body by David Koldos – with sealed bearings on the spindle for smooth throttle operation.

New Chrome Rocker covers fitted.

August – Reconditioned Heads, new Felpro gaskets.

Injectors cleaned, tested and new O rings fitted.

Re-set base idle and adjusted TPS to 5.4volts.

Re-set fuel pressure to 43psi.

New Steering Wheel fitted – very nice!

New HVAC Controller – this controls the heater/Aircon blower etc

hvaccontrol

New Power window switches

Re-fitted repaired Courtesy Lights Dimmer module.

Fitted new contacts to starter motor.

Fitted reconditioned Brake Master Cylinder, full fluid flush.

back to top

Sun
26
Dec

2004

In January I replaced the old throttle cable and lubricated the cable and throttle body with Lithium spray grease. This made the throttle very smooth, but turned out to be a temporary 12 week fix. The spindle that turns the throttle blades wears an elongated hole in the aluminium throttle body and this jams from the intake of air, even at idle making the throttle stiff.

In February 2004 I had the transmission fully serviced and a Transgo Shift kit fitted which is designed to update the 700R4 transmission and extend it’s life.

Also in February I replaced the stock sealed beam headlights with new Cibie headlights with special extra white globes.

The engine had a full service in March with new Bosch FR7DCX plugs, BP Visco 5000 Oil and VO68 Valvoline filter.

Replaced the Coolant Fan sensor switch in the Aircon line – this switch turns the radiator/condensor fan on when certain conditions are met such as speed under 30mph and aircon on

coolant-fan-switch

May – I fitted new delrin bushes to the left hand pop up headlight.

I Fitted a switch to disable the hatch lights, so the hatch could be left open without draining battery

Reset the mechanical idle and the Throttle position sensor.

Re adjusted the fuel pressure to factory specs.

June – Had brand new radiator fitted as the old one had developed a crack. This made such an enormous difference to the cooling that I had to uprate the thermostat to a 180 degree one as the car was running too cool.

Fitted re-valved Bilstein shock absorbers for a smoother ride.

July – Had the 700R4 auto transmission rebuilt with heavy duty drive shell etc. Work done by the highly recommended Neil Maxwell, at Precise Automatics, Beenleigh.

December – fitted new s/s brake hoses and upgraded bias brake spring.

Wed
10
Mar

Stereo –

500 Watts should do it…………

One of the options available for the 1988 Corvette was a special Bose stereo system.

The unit was designed by Bose especially for the Corvette’s acoustics and is very different from a standard car audio system because there is an individual amplifier mounted beside each speaker.

The speakers are surprisingly small and Bose designed special enclosures to enhance them and make them sound like larger ones. The speakers are also 1ohm which is unusual compared to the normal 4 ohm car speakers.

The technology is impressive and the Bose sounds good, but it’s not really loud enough and is only a radio and cassette deck.

I enjoy loud, distortion free music. A 200-watt CD Player performed well in my last car but I decided to try and improve on it. My ambition was to have a good clear sound system that fitted into the existing speaker areas because I didn’t want to lose any space in the car. I received a lot of helpful advice from the Corvette forum, from audiophiles who had ‘been there and done that’.

I decided to remove the bose system entirely and fit 6×9 speakers in the rear and 6" round ones in the doors, powered by a 500-watt amplifier – that should do it !

The finished system –

stereo1

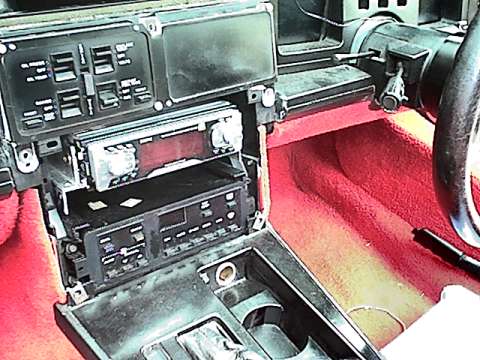
The Bose head unit is unusual because it is one and a half times the standard height, which makes fitting a standard 1 din unit more difficult.

The installation was complicated by having to remove the door amps and speakers, which are glued in and larger than the space available to remove them.

The biggest problem was finding somewhere for the 500-watt amp. The available space in a Corvette is limited, there’s no boot or glove box in the dash. After about 6 weeks of deep thought the solution was to mount it under the passenger side dash.

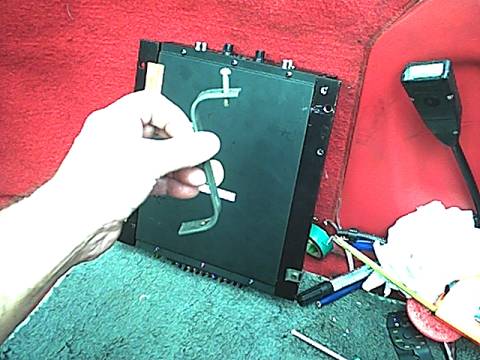
Because it’s fairly heavy I made up some brackets from mild steel that connect to the aluminium cross frame behind the dash. As the area is very cramped to work in, even with the seats removed, I tapped threads into the brackets, so those bolts could be tightened with just one hand.

Here’s one of the brackets held in front of the amp.

bracket1

Installing the amp took many hours but I know that it’s firmly fitted. The wire terminals are on the outside end, with easy access and the gain controls are on the other end, reachable from the driver’s side for easy trimming.

You can just see the front edge of the amp under the passenger side dash.

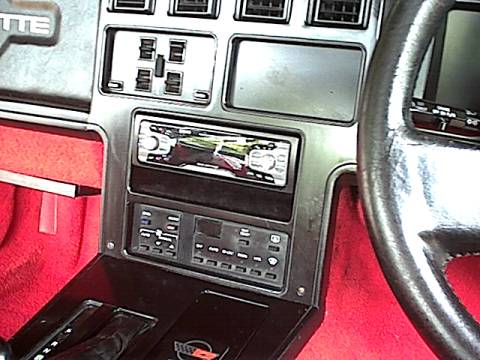
stereo3

Fitting the CD unit was difficult because of the 1 & 1/2" din size hole. I mounted the CD unit at the top of the space and constructed a felt lined tray underneath to store CD’s etc.

I cut 4 pieces of aluminium angle to length and connected one piece to each side of the CD player. I planned to connect the other two pieces to the sides of the hole so that the CD would sit on them and be held firmly with self-tapping screws.

Once the CD unit was in place it was impossible to reach in and insert or tighten screws. Eventually I solved the problem by gluing the aluminium to the plastic sides with Sikaflex, a very strong silicone glue. I wedged everything in making sure I had lined everything up exactly and let the glue dry overnight.

Here’s a picture of the CD unit sitting on the aluminium brackets.

stereo4

The Sikaflex held the aluminium angle in the correct position but it was not possible to fit a drill into the space to make locating holes, so I heated up a nail with a butane soldering iron and used that to make holes in the plastic for self tapping screws.

I ran a heavy gauge power cable directly from the battery to the amp and used the existing Bose connections to power up the head unit, which has remote switching for the amp and power aerial. The line out RCA sockets on the head unit connect to the amp with gold plated RCA plugs

Making up a black felt lined tray to fit in the space underneath was easy. I re-fitted the front cover and stepped back to admire my work.

stereo2

I Finally finished this project in February 2004 – I experimented with 6" round door speakers but found it hard to get a constant balance between front and rear speakers. It was hard to set the 7 band equaliser in the Sony CD player to suit both sets of speakers, basically the rears needed some highs and the front one’s some lows.

I was very happy with the rear speakers so eventually I cut out larger holes in the doors and fitted identical 6 x 9s into an aluminium plate that was bolted to the inner door frame. Now I have good balance between front and rear and can contour the sound to suit the acoustics of the Corvette and my ears.

The volume is impressive, you can feel the kick of the drums through the seat and doors. The gains on the amp are set to just under half. At ordinary levels the sound is very clear, a very satisfactory project.

Special thanks to the Audio section of Corvette Forum and in particular ‘Kale’, for so much information.

back to top

Sat
6
Dec


2003 Before registering the car in Queensland and driving the 1700kms from Brisbane to Cairns (1056 miles) in April 2003, I arranged for a full service and inspection – this covered the following –

New Plugs, Engine and power Steering oil, Air and Fuel filters,

I had a 160degree theromstat fitted, new Serpentine belt, new hood release cables, coolant.

The Mass Airflow Sensor was throwing a fault code which was traced to the relays which were replaced.

A new Power Steering pump was fitted.

The Aircon compressor and Altenator brackets were re-welded. T

wo new Falken 275x40x17 tyres were fitted to the front.

Two new mufflers and rear exhaust pipe fitted. V

arious light globes were replaced in the dash and 3rd brake light

New power window switches.

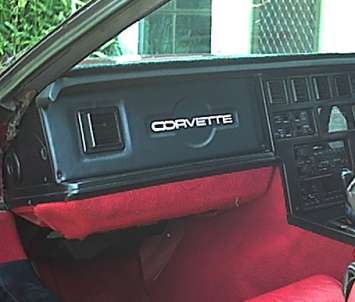
I had the infamous ‘Breadbin’ passenger dash pad replaced with a custom flat one engraved with the word Corvette – dash2

Once back in Cairns, in June I had new disc pads fitted all round.

In June I drained and refilled the Differential with Mobil synthetic oil and added 1 bottle of friction modifier

In October I removed the radiator and had Ryans Radiators remove the ends and clean and flush the radiator.

This made a huge difference to the running temperatures. Corvettes are designed to run hot but added to the tropical heat of Cairns there were days when the engine temps went above 110C. Now they are usually in the 90’s. I discovered that the computer is programmed to turn the engine cooling fan on at around 116C – far too late. I fitted a temporary manual switch to turn the fan on when needed and plan to get the computer chip re-programmed to turn on at 96C and off at 93C.

I had the AIR pump engineered with better bearings.

I had the spot weld on the power window A frame re-welded. It won’t break again.

I replaced the Oxygen sensor with a newer more efficient heated one in December 2003

I replaced the rear tyres with Kumho 712 275/45/ZR17

In December 2003 I fitted new delrin bushes to the right hand pop up headlight which had begun to slip. I bought bushes for both headlights, and later fixed the other side.

back to top

Sat
6
Sep

sheepskin15

Seats –

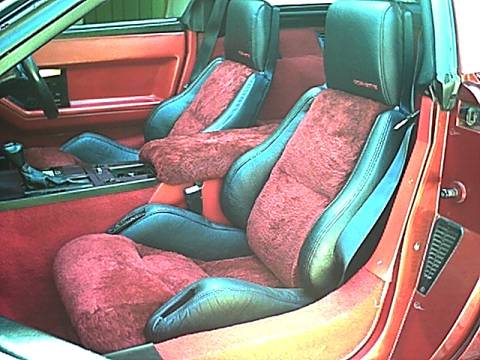
The existing leather seats were the most comfortable car seats I have ever sat in but leather is just too hot for my part of the world.

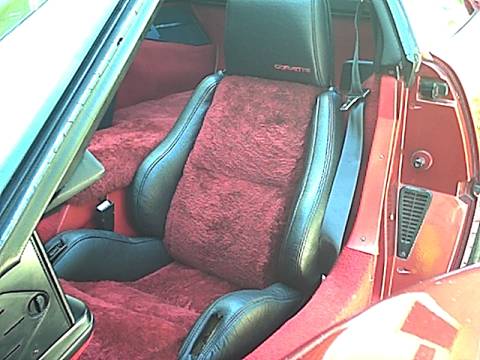
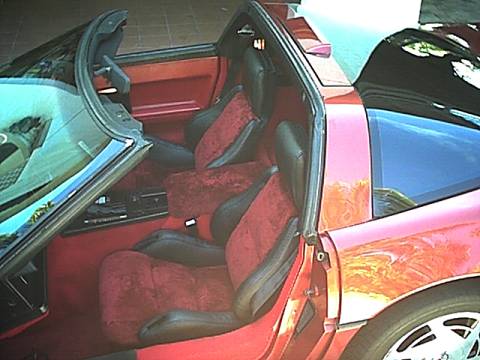
To stop from sweating I had to sit on a towel even in winter, so I recovered the seats with black leather side bolsters and thick sheepskin centres, which are coloured a deep Burgundy.

sheepskin21

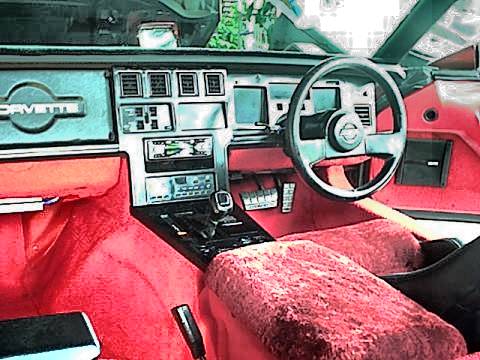
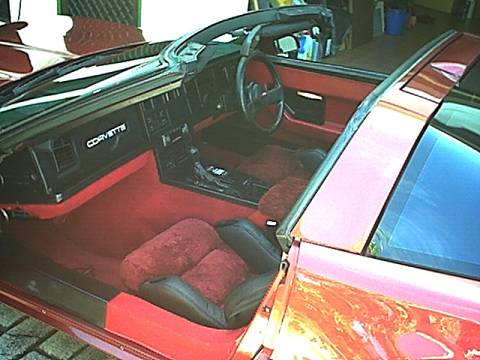
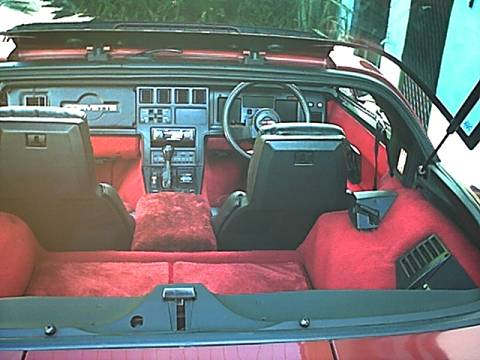
I’m so comfortable sitting ‘in’ the sheepskin seats and they’ve added to the appearance of the interior, which looks great. I’ve covered the armrest with matching sheepskin.

sheepskin51

The power sports seats have 9 controls. Everything is electric. The seats go forward and back, the front goes up/down, the rear goes up/down, the seatback reclines, the side back bolsters squeeze in and out for a firm fit and there is an airbladder with three sections in the lower back of the seat.

Some of the seat controls fit into the leather bolsters, I ordered new bezels for them and these pictures were taken before they had arrived.

sheepskin41

The steering column is adjustable in height and travel so no wonder I think it’s the most comfortable car I’ve ever driven.

sheepskin31

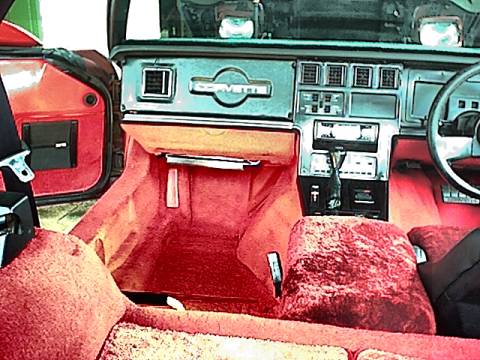
Also visible in the photo’s is my ‘breadbox’ replacement – a padded black vinyl panel with ‘Corvette’ embroidered in the area stamped in the famous Corvette ‘Bow-Tie’ shape.

back to top

frontplate2


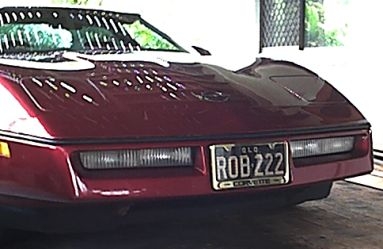
Registration Plates – I’d thought about having personal plates for a long time, getting my Corvette was the ideal opportunity – after all, it is my dream car so I want everything to be perfect.

I wasn’t sure if I should have my name on the plate, I thought it could be annoying but after the first year with them, I knew there was no problem. I’ve only had good experiences. Very Occasionally someone calls out "Rob !" always very friendly and admiring the Corvette.

One guy was talking on his mobile phone and asked me to give the engine a rev so his mate could hear it over the phone ! which I did. Kids are amazing, they know what a Corvette looks like, although they are fairly rare here in Australia. Heads turn wherever I go. That’s the kind of experience that owning a Corvette gives. People like to talk about the car, everyone knows what a Corvette is and thinks, like me, that they are very special.

When I was young our phone number was 222. The bus I caught to school was number 202. Somehow the number 2 has always been associated with me. When we first got a telephone number in Cairns many years ago, I was lucky enough to be able to get one that ended in 222. It was only natural that the numbers on my personal plates would be 222 – I didn’t even think about it.

back to top